KYC Checks
Know Your Customer or KYC is the process of verifying the identity of your clients. It is an important process that is typically carried out at the beginning of a business relationship to ensure that the client is who they say they are and that the risk of doing business with that client is understood and managed. The KYC process also extends to the ongoing monitoring of the client’s activities and responding to any unusual behaviour that may pose a risk to your business.
In MLVerify we enable businesses to easily apply KYC checks to clients, assign a risk score, schedule periodic reviews and record notes and key events. In this guide we will explain how to assign one or more KYC checks to a given client.
Assigning a KYC check to a client
Once you’ve created a client you can now assign specific KYC checks to the client and email a link for them to complete those checks. A KYC check can be a request to upload a document or a specific question that the client must answer. To simplify this process MLVerify allows you to setup reusable KYC templates, but don’t worry we’ve pre-loaded a few useful ones to get you started.
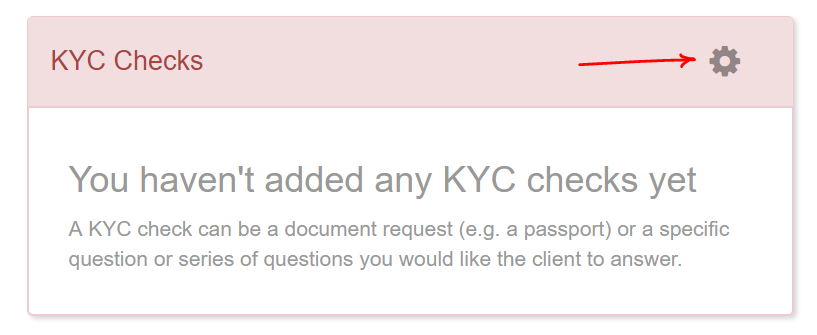
For any given client you can see a list of KYC checks by clicking the corresponding cog icon in the KYC Checks panel on the client detail screen.
You can then click the button “Add new KYC check” to assign a new check.

You can repeat the above step to add multiple checks. Don’t forget you can also create your own KYC templates to add more bespoke checks that are suitable for your business and clients.
Once you’ve entered the checks they will appear on the main KYC list for that client.

Once you’ve added all the checks you can then click the button “Send to Client”. You will be prompted to enter an email address for your client and an expiry date for the link (default is 14 days).
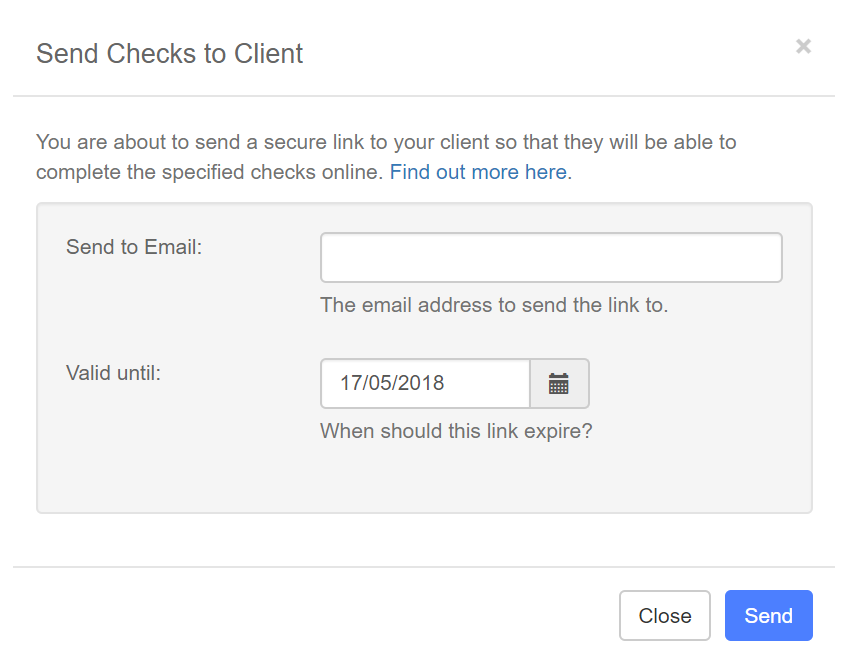
Once you click the “Send” button we will email the client with a link to the portal where they can complete the required checks.
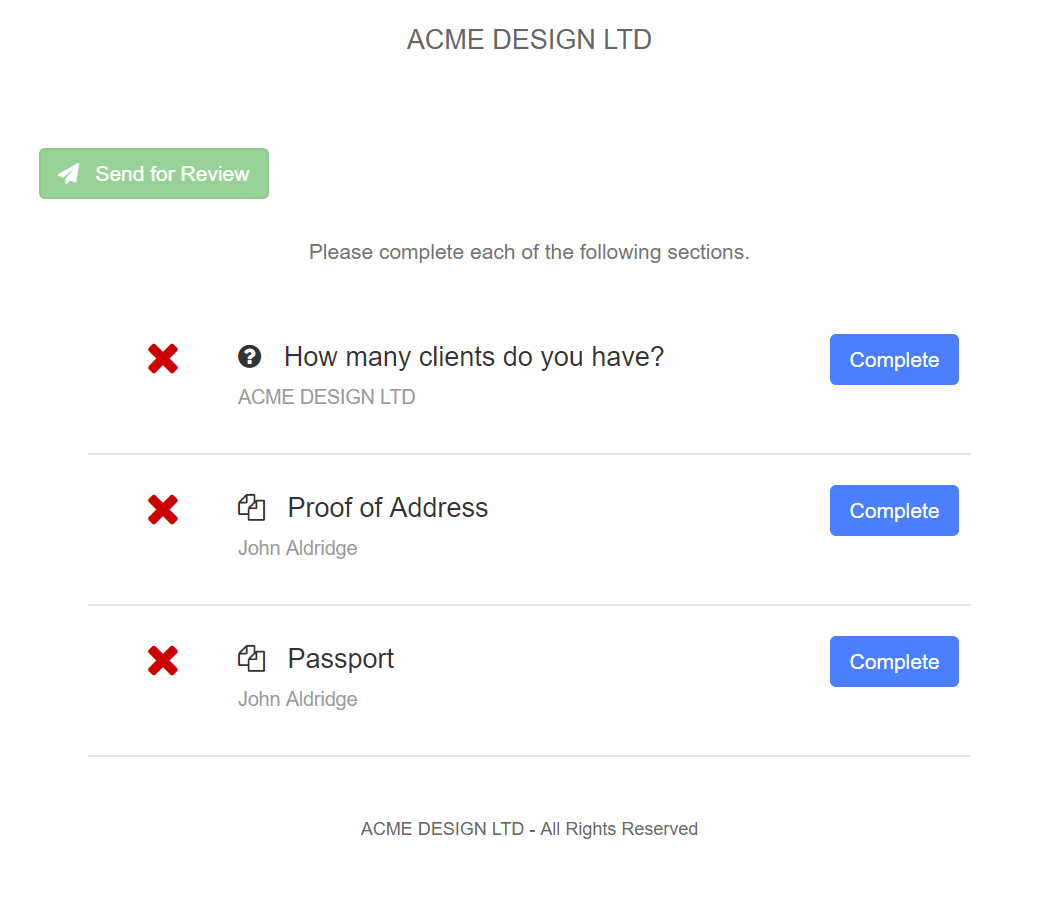
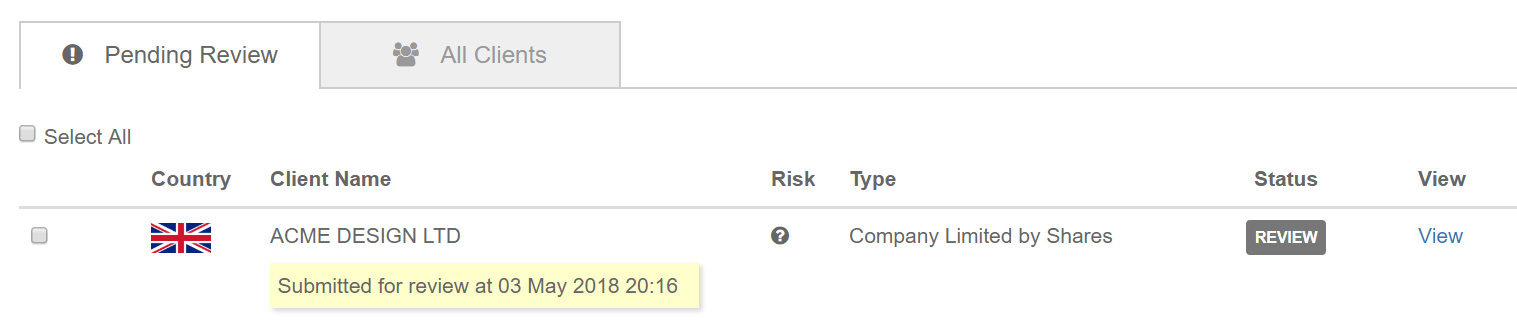
The client can then complete each section, uploading the required documents and answering any questions you have set up. At the end of this process, the client can submit the KYC checks for review. Once this has been done the client will appear on your admin dashboard
When viewing the KYC checks you will now notice a “Verified” and “Decline” button at the top of the screen.

If you are happy with all the responses provided you can accept the checks and mark the customer as verified. Otherwise, if there are any problems you can also mark as declined, then provide specific reasons for declining the checks.
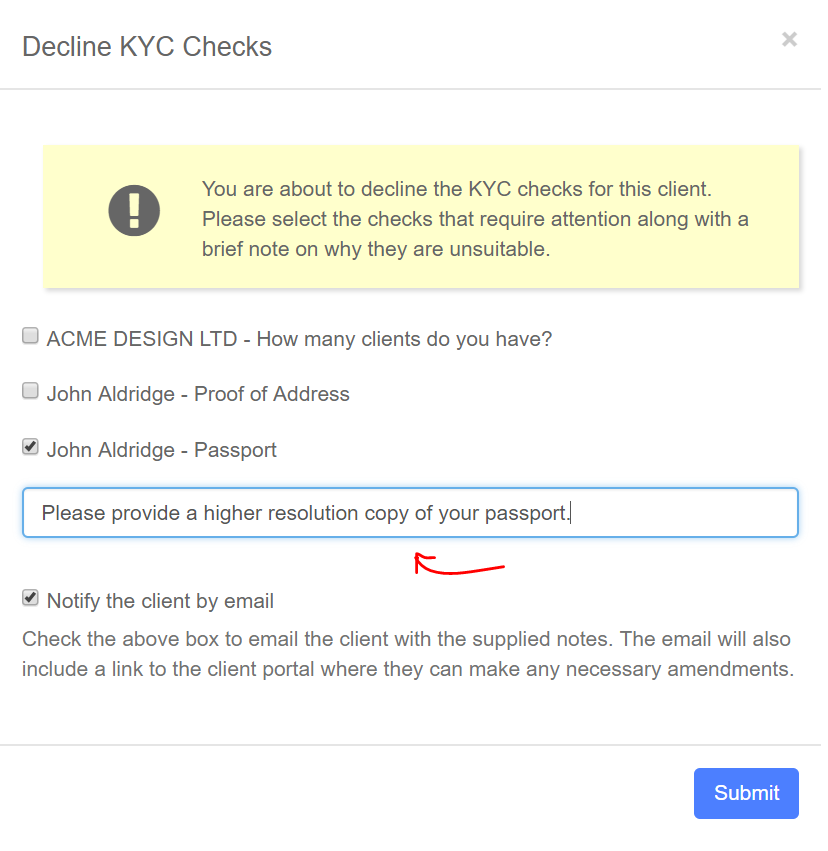
With any declined checks the client will be notified by email and prompted to complete those invalid or missing sections. They can then resubmit the checks for further review.